So, this is one of my favourite charging devices for the LiPo batteries I use in RC flying. It’s the SkyRC B6neo+. I mostly fly gliders, which require relatively modest battery capacities. The whole idea is to get the aircraft up with a bit of motor power, then trust the thermals — finding what we call a “bubble”, a column of rising air — start circling and just let yourself be carried. That’s been working reliably for many years, and I don’t see any reason from a physics standpoint why that should change anytime soon. So I don’t need to charge enormous batteries, which means I don’t need an oversized charger either.
I came across the SkyRC B6neo+ a while back. What I love about this charger is that it can be powered both via DC through the XT60 port with a wide range of voltages and via USB-C with Power Delivery. So an old 60W laptop power brick does a fantastic job charging all my batteries through it. Especially since my packs are usually no larger than 3S 2200mAh and I have time to charge during the working day, this charger suits me perfectly. My little Laubfrosch — a 1.4m glider — or my Hobbyarena Chilli (F5L) glider have even smaller capacities of 1100mAh and 450mAh respectively.
Unfortunately, however, the following happened: while modifying my Sky Surfer X8, I wanted to glue a bracket for the aileron servo connectors into the fuselage. I had everything positioned correctly, was holding it all together, and was focusing on finding exactly the right spot to apply the glue. So I unscrewed the super glue bottle, intending to place one or two drops precisely where needed. To help the glue flow nicely behind the bracket, I’d chosen extra thin, low-viscosity super glue. What I failed to notice was that I hadn’t unscrewed just the nozzle tip — I’d unscrewed the entire cap, and then proceeded to rather generously pour all 10g of that ultra-thin super glue directly into my aircraft. Naturally, the glue ran everywhere and dripped straight onto my SkyRC charger and the connected battery, which happened to be sitting in the exact drip zone, fusing everything into one unified lump.


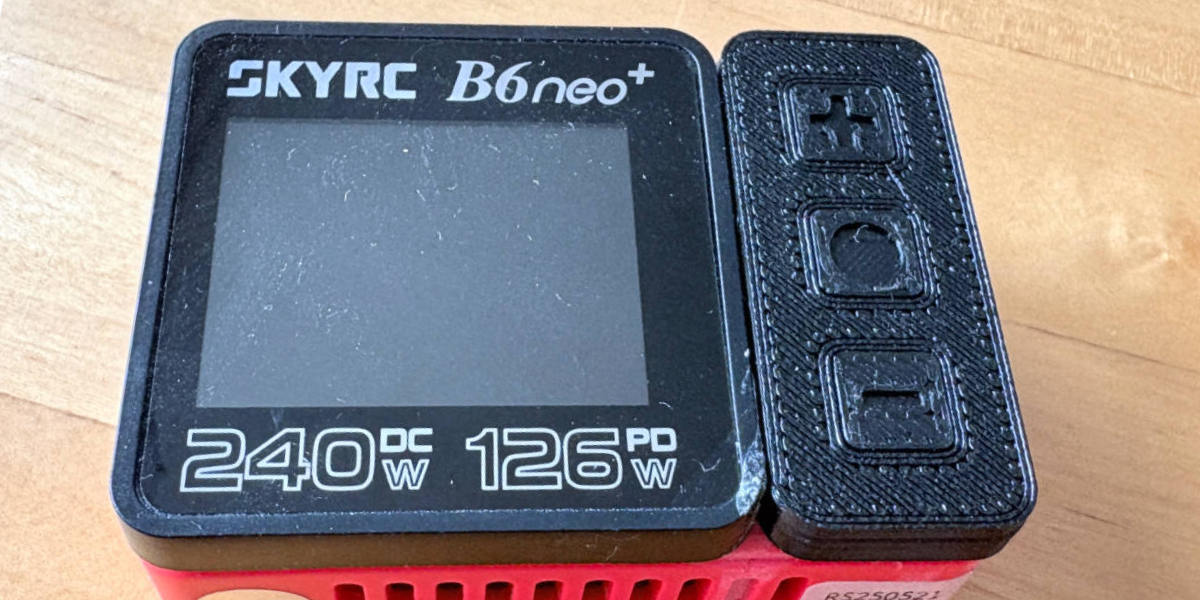
Yes, yes — you should always clear your workspace. But it was supposed to be just this one tiny glue joint, the table was basically clear, and yet fate decided that the charger and battery should be positioned precisely where the superglue tsunami chose to flow. I managed to separate the battery from the charger just in time. After that, I threw everything into a box — except the battery — and ignored it for the next several months. Eventually I tidied up, rediscovered the box, and decided it was time to part ways with the charger. But somehow I just couldn’t bring myself to throw it in the bin. Armed with a generously-sized pipe wrench, I broke off part of the housing — specifically the section where the control buttons had become one with the top of the charger. Wonder of wonders: the buttons underneath were completely intact and unaffected, and the PCB had escaped without a drop of glue. The superglue had apparently just flowed over the charger, only gluing all the controls on the right side together. Sadly, there are no photos of this disaster. So I sat down and designed a replacement control panel with matching buttons in FreeCAD in just a few minutes. The whole thing was then printed in PETG on my little 3D printer, a BambuLab A1 Mini. Unfortunately, during the process of breaking the charger housing open, all the mounting points were damaged and torn off — so it wasn’t really worth modelling those in FreeCAD as well. I grabbed two drops of super glue and simply glued the new panel on. The charger is quite used to that sort of thing by now, anyway. I’m not entirely sure it makes sense to have multiple hobbies just so one can be used to repair things from the other. But in this particular case, one might argue that it helps to escalate in one hobby — in order to keep the other one going.
You can download the model files directly here. I have attached both the FreeCAD source file and the STL file below.